|
How to Roast a Turkey - from Family Christmas OnlineTM
Every year, thousands of new families attempt something their mothers or grandmothers made look easy - cooking a turkey.
Usually the first thing they learn is defrosting a turkey slowly in the refrigerator almost never works. The second thing they realize is that the turkey "takes over the oven" for several hours the morning you cook it, so they can't get anything else done in the oven. And then folks can't help remembering all those warnings about contamination or underdone meat, and so on.
Not to worry - we have put together a list of things that work for us and most of the people we know. And if you get into a pickle anyway, we have a whole bunch of hotlines and other resources you can try at the end of the article. And here are two family secrets your grandmother never shared:
- It is almost impossible to ruin a turkey if you make any attempt to follow directions at all.
- Even if you do ruin a turkey, nobody in your family is going to say anything because they don't want to be the person in charge of the turkey next year.
Once you've done one turkey, you'll realize that, although they require thought and preparation "up front," once you have them started, you can safely ignore them for hours on end while you're trying to get everything else done. If you are a diligent cook and have lots of other good things on the table, you're likely to get more compliments about the turkey than anything else, even if cooking the turkey took less effort than anything else you did for the meal. In other words, it is HARD to go wrong.
That said, we've recorded our experience and compiled the best advice we've received over the years into one fairly long article, just to give you a reference, and a place to look if a question comes up. Don't feel bad about how long this article is. In fact, it will probably take you more time to read this article thoroughly once than you actually spend preparing your turkey. We're just trying to fill in all the gaps the other folks leave out, so you don't have any unpleasant surprises. And if this isn't enough, at the end of the article is a list of web sites and hotlines you can contact for more information.
Here are the basic steps and considerations:
- Decide what you will cook it in - as you'll see below, that will limit the maximum size of your turkey and give you some idea of how long it will take to cook it.
- Decide how many people you will be feeding - this will help you estimate the minimum size of your turkey.
- When you buy your turkey, buy a big onion and anything else your recipe book or family tradition says you should have to prepare it, such as butter or margarine. (What you do about stuffing, cranberry sauce, etc., are up to you.)
- Store your turkey in such a way that is ready to cook when the time comes - this may require defrosting, a step some folks don't take into account when they buy a frozen 24-pound turkey the day before Thanksgiving.
- Prepare your work surface so you don't contaminate your turkey.
- Prepare your turkey and get it started cooking.
- Clean your workspace, hands, and any implements, you used so you don't carry contamination from your turkey to other food.
- Start on the rest of your cooking for the day.
- Between 1/2 and 1 hour before your turkey will probably be done, harvest some liquid to make gravy. Make gravy.
- After the turkey is done (2-5 hours depending on the size of the turkey and the method you used to cook it), get it out of the oven or roaster. Because of internal heat build-up, the turkey will still be cooking from the inside out for the next 20-30 minutes, so it needs a chance to cool before you go after it with a knife.
- Carve the turkey and serve.
That doesn't really sound all that hard, does it? The truth is that in most households, 90% of the work on the turkey is done well before it's necessary to start on anything else. That said, preparation for the turkey and preparation of the turkey do take some thought, so the following sections break down the steps I listed above.
Decide What You Will Roast It In
Before you buy your first turkey, you should have some idea of what you will use to cook it. Unless you're using one of those deep-fryer grease-filled things (which I will not attempt to document except to say don't stand them on a wooden deck attached to your house) you'll want to roast your turkey slowly in a container that holds in most of the moisture, and that will contain the broth. Some examples are:
 Roasting Pan - This is what I grew up with, a large, deep, oval-shaped pan with a high arched lid that is molded both to accommodate a large turkey, and to collect moisture which supposedly drips back on to the turkey. That's where they get the name "self-basting." These are handy if you don't mind cleaning them up and if you have the space to save them the 363 days of each year that you're not using them. Roasting Pan - This is what I grew up with, a large, deep, oval-shaped pan with a high arched lid that is molded both to accommodate a large turkey, and to collect moisture which supposedly drips back on to the turkey. That's where they get the name "self-basting." These are handy if you don't mind cleaning them up and if you have the space to save them the 363 days of each year that you're not using them.
- Deep Pan With an Aluminum-Foil Tent - If you don't have a roasting pan but you have a rectangular cake pan or something large enough to hold your turkey, with sides at least two inches high, you can use that. The turkey suppliers recommend that you make a tent out of aluminum foil and put over the turkey for most of the cooking time to keep the breast from drying out.
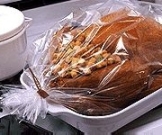 Roasting Bag - These are high-tech plastic bags that you use with a deep pan of some sort. Because they hold in more moisture than the roasting pans, they cook the turkey a little faster than a roasting pan. Roasting bags also make cleanup easier. Folks with roasting pans often use these instead of the big lids, so they get the advantages of quicker roasting and easier cleanup, without the risk of spilling the broth. (You can't get by with a cookie sheet, because your turkey may generate enough broth to overflow the sides when you slit the bag to get the turkey out.) Note: Reynolds, who makes a popular roasting bag, has an excellent article on cooking turkeys on their web site. If this is the way you decide go, you should still find our content on preparation and carving useful, though. Roasting Bag - These are high-tech plastic bags that you use with a deep pan of some sort. Because they hold in more moisture than the roasting pans, they cook the turkey a little faster than a roasting pan. Roasting bags also make cleanup easier. Folks with roasting pans often use these instead of the big lids, so they get the advantages of quicker roasting and easier cleanup, without the risk of spilling the broth. (You can't get by with a cookie sheet, because your turkey may generate enough broth to overflow the sides when you slit the bag to get the turkey out.) Note: Reynolds, who makes a popular roasting bag, has an excellent article on cooking turkeys on their web site. If this is the way you decide go, you should still find our content on preparation and carving useful, though.
 Electric Roaster - When I was little, I would see this in cafeteria or church kitchens, anywhere you might need to heat a big pot of beans or something and keep it hot for hours. Today's version is likely to be made by the same people who make crock pots. Generally the box will say something about what size a turkey you can cook in them, so if you're buying one you hope to use for turkeys, take that into account. Most often they recommend about a pound of turkey for each quart of capacity, so an eighteen-quart roaster can handle an 18-pound turkey. Electric roasters do share the "storage" problem with roasting pans - you have to have room to store them while you're not using them. On the other hand, we use our a lot more often than we ever used the roasting pan, because they are handy for other things besides turkey. The big advantage over roasting pans or roasting bags is that electric roasters free up your oven so you can be heating your casseroles or whatever while the turkey is cooking. Electric Roaster - When I was little, I would see this in cafeteria or church kitchens, anywhere you might need to heat a big pot of beans or something and keep it hot for hours. Today's version is likely to be made by the same people who make crock pots. Generally the box will say something about what size a turkey you can cook in them, so if you're buying one you hope to use for turkeys, take that into account. Most often they recommend about a pound of turkey for each quart of capacity, so an eighteen-quart roaster can handle an 18-pound turkey. Electric roasters do share the "storage" problem with roasting pans - you have to have room to store them while you're not using them. On the other hand, we use our a lot more often than we ever used the roasting pan, because they are handy for other things besides turkey. The big advantage over roasting pans or roasting bags is that electric roasters free up your oven so you can be heating your casseroles or whatever while the turkey is cooking.
Choose Your Turkey
Now that you've thought about how to cook it, you may need help deciding what kind and size to buy.
How Big a Turkey Do You Need?
Okay, so you may have some idea of the largest turkey you can cook. What's the smallest turkey you can get by with and keep everybody happy? Most experts say that somewhere between 1 and 1.25lbs of turkey per person will provide big helpings and a reasonable amount of leftovers for the average crowd. So if you're only having nine people, that 20-pound turkey may be overkill - a 12-pounder may do the job, unless you want lots of leftovers.
"Fresh" or Frozen?
Non-frozen turkeys usually cost a little more than frozen turkeys, and you need to buy them closer to the holidays. That said, you don't have to thaw them, which is sometimes an issue with a frozen turkey. We almost always buy frozen turkeys, because they often go on sale a week or more out for a very good price. It would be nice if I could say that
non-frozen turkeys taste intrinsically better than frozen turkeys, but I can't. That said, if you're buying a big turkey to cook in the next couple of days, don't buy a frozen one. Conversely, the USDA says that frozen turkey will keep for almost a year, so nobody says you can't buy your Christmas turkey when they go on sale at Thanksgiving. (More on defrosting frozen turkeys is below.)
Name Brand or Generic?
Again, name brand turkeys don't always taste better than "generic" turkeys, but they do usually have better quality control, so you're less likely to come up with something weird. If the "name brand" costs about the same, I'll get it. If it's .20 more a pound, I usually don't bother.
Store and Defrost (if Necessary) the Turkey
As you'll see later, cooking a turkey is easy. The big questions are usually a: where to store it between the time you get it home and the time you need to start to cook it, and b: how can you make certain it is ready for cooking when you need it to be (and not before or much later)?
Obviously, if you get a non-frozen turkey, you stick it into your refrigerator until right before you need to cook it. If you happen to stick it in the freezer and let it freeze, you'll have to defrost it like any other frozen turkey.
The Thawing Question - Now, if you get a frozen turkey, the instructions will almost certainly say to defrost it "in the refrigerator." This is supposed to allow it to defrost while staying cool enough to be safe. Most packages that turkeys come in say to allow 2 or 3 days. However, the National Turkey Foundation recommends 24 hours for every 4-5 pounds, so a 20-pound turkey could take 5 days by this standard.
Your turkey does not have to be thawed clear through to begin preparing it, but it should be thawed enough for you to get the "giblets," neck and other things out of the cavities. Try poking it with your finger. If the turkey was thawed slowly and you can indent it 1/4" or more all the way around before you hit real resistance, that should be sufficient to get started on the preparations.
On the other hand, you may do things "right" and still discover that your turkey is still frozen as hard as a cement goose by the night before you're planning to cook it.
The National Turkey Foundation has directions for thawing a turkey in cold water, soaking it in the original wrapping. They say to allow 30 minutes per pound and change the water every thirty minutes. Unfortunately, that means that if you wait until the night before, you will have to get out of bed somewhere between 10 and 20 times to change the turkey's water. That said, if you have left the thing in the refrigerator as long as you should have, it might not have that far to go, so what I've just specified is a worst-case scenario.
Some folks claim that you can defrost a turkey in the microwave (if you can fit it in). What they don't really explain is that, no matter how careful you are, it is nearly impossible to defrost a big piece of meat without the outside edges starting to cook. So once you get your defrosted turkey out of the microwave, you have no choice but to get it into the oven as soon as possible - otherwise the semi-cooked meat on the outside will start to go bad quickly.
All experts say not to leave your turkey on the kitchen counter. They're apparently worried about the outside of the turkey getting warm enough to start going bad before you start your preparations. If you do resort to your kitchen counter or some such, wrap several plastic bags around it to reduce condensation or leaks and to keep the skin temperature closer to the core temperature as the turkey warms. As soon as the turkey "gives" to the touch, get it back into the refrigerator or start your preparations.
Finally, the USDA says "It is safe to cook a turkey from the frozen state. The cooking time will take at least 50 percent longer than recommended for a fully thawed turkey." They also remind you that, if the turkey was too frozen to remove the "giblet packages" before you started roasting it, you need to get them out as soon as you can, using tongs or a fork so you don't burn yourself. (We'll talk about giblets later.)
Again, once you've done a turkey or two, you'll figure out what works best for you.
Prepare the Workspace and Turkey
Before you start the next step, let me assure you that the 99.99% of turkeys sold commercially in the United States and Canada are 100% safe to eat if they are properly prepared. Still, any uncooked bird does carry bacteria that can cause food poisoning if it's allowed to grow undisturbed at temperatures between 35�F and 165�F. So it's better to be a little compulsive about cleanliness and safety during preparation than it is to worry about possible contamination later on.
The safeguards in the next few lines focus on:
- Reducing the chance of contaminating the turkey during the preparation process,
- Reducing the chance of any extraordinary contamination in the turkey remaining through the cooking process, and
- Reducing the chance of any contamination from the turkey remaining on your work surface or utensils to contaminate other foodstuffs after you've prepared your turkey.
I am an early riser by my family's standards. I'm often awake by 6:00, even on days I don't set my alarm. So it's no big hassle for me, on Thanksgiving or Christmas morning to stumble downstairs, put on a pot of coffe, and start washing out the sink and my work surface. That way the turkey is usually started by 7:00 and ready to start cutting and serving by 11:30 or 12:00. If you have a smaller turkey or are using a cooking bag, your timeframe will be shorter.
One of the first steps will be to wash your turkey, inside and out. If you don't have a basin big enough to use for this (most people don't), you can use the sink; just make certain it is well scrubbed and well rinsed.
This is how I use our two-basin sink:
- I wash out whatever I'm going to cook the turkey in with hot soapy water.
- I scrub out both basins with a germ-killing product.
- I rinse that away thoroughly.
- I put a couple spare plastic grocery bags in one side (to collect scraps and trash) and put the turkey, bag and all, in the other side.
- I cut the bag off the turkey and stuff it into the grocery bags.
- Usually the turkey's legs are tied or wired together with the tail stuffed up in between. The cord or wire tying them together are usually anchored elsewhere on the turkey. To clean the turkey well (and sometimes just to get out the giblets), it is necessary to pop the legs out of whatever is holding them together until you're done, then pop them back in.
- If the turkey's cavities are thawed enough to reach into, I reach in and bring out the giblets and neck. "Giblets" is a nice word for liver and gizzard and other weird things your grandmother would have found a use for but that you will likely never use. If you want to give the liver to your dog or cat, be sure to cook it thoroughly first. My cats don't like giblets either, so I've been disposing of them most of my adult life.
- Getting the water as hot as I can from the tap, I rinse out the inside of both cavities, using my bare hands to reach in and make certain there isn't anything gooky left inside.
- I wipe or scrub the outside of the turkey, getting around the wings, thigh and leg as well.
- Now my hands are messy. For safety's sake, I consider them to be contaminated, all the way up to my elbows. I move to the right side of the sink and wash them with soap, being careful not to get soap on the turkey.
- I make certain whatever I'm cooking the turkey in is ready. If it's a roasting bag in an open pan, I follow the manufacturer's instructions. (Usually that consists of dumping a tablespoon of flower into the bag and shaking it up, then getting the bag aligned in the pan ready to dump the turkey in. They also say to cut slits into the bag, but I find it easier to do after the turkey is inside it - just be certain not to cut the turkey up at the same time.)
- Now I maneuver the turkey into the cooking pan or roaster or whatever, breast side up. (If it's a big one, I may ask for help.)
- If I haven't done it already, I pop the legs and tail back under the cord or wire that was holding them.
- I wash my hands again, then scrub the sink, faucet, and anything else I may have touched with "turkey fingers." (If someone has helped me maneuver the turkey into the cooking vessel, I have them wash their hands with soap, too.
- I do any last-minute preparations on the turkey. Usually we just stick a big onion in the cavity and "let-er-rip." Some recipes recommend spreading melted butter and some herb or spice over the turkey breast and legs. We've done that with garlic, and the garlic flavor suffused the entire turkey and tasted great; however that is not a universal favorite, so I wouldn't recommend it for a general audience. The USDA suggests tucking the tips of the wings under the "shoulders" of the bird.
- If you are set on sticking dressing in the bird, go for it. However, I think that tradition has more to do with getting the dressing out of the way than anything else. If you do stick dressing in your turkey, remember that you will need to add about a half-hour cooking time and to be extra careful to make certain the turkey has gotten at lease 165F inside and out. I wouldn't dream of cooking dressing in the turkey without having a meat thermometer handy. Besides, by doing the dressing on the stove later, I can get the turkey in the oven or roaster that much sooner.
- Some recipes or manufacturers instructions say to add � cup of water to the bottom of the pan.
- Put the lid or aluminum-foil tent over the turkey. (If you use an tent, make certain it is not resting on the turkey or that it is not knocked askew by any doohickies in the top of your oven when you slide the thing in.)
- Wash your hands and any utensils you've used since your last washup.
- Make a note of the time
- Get on with your life. You're done with the turkey, except for making gravy and slicing the beast.
The USDA says: "REMEMBER! Always wash hands, utensils, the sink, and anything else that comes in contact with raw turkey and its juices with soap and water."
Do The Rest of Your Cooking and Cleaning
The turkey is on it's own for the next several hours. Here are some estimates of how long you have to get other things accomplished before you have to get it out again.
Roasting Times for a Whole Turkey Cooked in a 325�F Oven
If you don't have a roasting pan, these figures assume you will be using aluminum foil to make a "tent" over the turkey for at least the first half of the cooking time. They are from the
USDA website. Times are approximate.
| Weight | Unstuffed | Stuffed |
| 8 to 12 pounds | 2� to 3 hours | 3 to 3� hours |
| 12 to 14 pounds | 3 to 3� hours | 3� to 4 hours |
| 14 to 18 pounds | 3� to 4� hours | 4 to 4� hours |
| 18 to 20 pounds | 4� to 4� hours | 4� to 4� hours |
| 20 to 24 pounds | 4� to 5 hours | 4� to 5� hours |
Roasting Times for a Whole Turkey Cooked in a 325�F Electric Roaster
(From the Hormel web site. Times are approximate - follow the roaster manufacturer's instructions if available)
| Weight | Unstuffed | Stuffed |
| 8 to 12 pounds | 2� to 3 hours | 3 to 3� hours |
| 12 to 14 pounds | 3 to 3� hours | 3� to 4 hours |
| 14 to 18 pounds | 3� to 4� hours | 4 to 4� hours |
| 18 to 20 pounds | 4� to 4� hours | 4� to 4� hours |
| 20 to 24 pounds | 4� to 5 hours | 4� to 5� hours |
| 24 to 30 pounds | 5 to 5� hours | 5� to 6� hours |
Note: Some folks suggest that if you use an electric roaster, you can brown the turkey better at the end in a real oven. You would preheat a conventional oven, then remove the turkey 30-45 minutes before the "done" time and finishing it in the oven without a lid. Baste the turkey with butter before you stick it in. This will give the skin time to get a nice brown finish. The turkey will push everything else out of the oven during this finishing time, and it doesn't really affect the flavor of any slice after the first one, so it's up to you to determine whether the cosmetics are this important.
Roasting Times for a Whole Turkey Cooked in a 350�F Oven Using a Cooking Bag
From the Alcoa Reynolds web site. Times are approximate - follow manufacturers instructions if available)
| Weight | Unstuffed | Stuffed |
| 12-18 lb. | 2 to 2� hours | 2� to 3 hours |
| 16-20 lb. | 2� to 3 hours | 3 to 3� hours |
| 20-24 lb | 3 to 3� hours | 3� to 4 hours |
Make Last-Half-Hour Preparations
30 or 40 minutes before your turkey is supposed to be done, you may want to do the following optional preparations.
Brown Your Turkey (If You Want)
If a brown turkey is important to you, about 30 minutes before the turkey is supposed to be done, you need to let the turkey get exposed to direct oven heat. If it's already in the oven, you can simply remove the roaster lid or aluminum "tent." If it's in an electric roaster, you can transfer it to the oven. We never bother with this step, and the turkey gets a little brown anyway by the time it's done, no matter how we cook it, so this is up to you.
"Borrow" Broth for the Gravy
If you want to use turkey broth instead of pan drippings for your gravy, you might want to snag some a half hour or more before the turkey is likely to be done. Work fast, because if you leave the turkey exposed to the kitchen air for five minutes while you're doing this, you will slow its cooking time by double that or more. If you do get some broth at this stage, get it into the freezer so the fat can separate out quickly. More information about cooking gravy with real turkey broth is contained in the article How to Make Reduced-Fat Turkey Gravy
Decide Whether It's Ready to Come Out
How can you tell when it is done?
- If you have a meat thermometer, you can measure the internal temperature of the breast and the thigh.
- According to Hormel, the breast must reach an internal temperature of 170�F and the thigh must reach 180�F.
- According to Ochef.com, waiting until the turkey breast's internal temperature is 170�F will actually overcook the bird, because "the turkey will continue to cook during the 20 to 30 minutes you let it rest on the counter, while the juices are redistributed throughout the meat." They recommend removing the bird from the oven when it when the internal temperature of the breast reaches 165�F (74�C). Still, if you have stuffed your turkey, I would tend to go on the "high side," as Hormel recommends, rather than risk uncooked stuffing.
- If you don't have a meat thermometer, but the turkey came with a little button that is supposed to pop out when the bird is done, that's a pretty good indicator. The 30+ times I've done this, the button has refused to pop out twice, on a few occasions, it has popped out several minutes after the bird was probably safe to eat, but it has never popped out while the bird was undercooked.
- If neither of the above indicators is available (or conclusive), use the point of a knife to make a deep puncture into the breast and squeeze it a little. If the juice that comes out has any red in it at all, put it back into the oven. If the juice is clear, try the same test on the thigh. If that juice is clear, you should be good to go. That said if, while you're carving, any red juice comes out of any piece of meat, don't serve that piece of meat until it's cooked individually (like in the microwave). Again, it the thirty or so times I've done this, this has never happened with a turkey, though it has happened with chicken.
- Generally if the dark meat pieces are starting to "fall off the bone," or if the leg and thigh can be separated with a light "tug," your turkey is a little overdone (although I like it that way, being a dark meat fan myself).
Let the Turkey Cool a Little
Most folks say that the turkey is easier to cut and tastes better overall if you give it about twenty minutes to cool. In families that use the "pan drippings" to make gravy, or who got their broth out early enough to let it cool, this is usually plenty of time to make a batch of gravy while other folks are setting the table and pouring drinks. (If folks are still preparing other dishes, though, it could get interesting.) We have an article about cooking low-fat gravy with real turkey broth in the article How to Make Reduced-Fat Turkey Gravy
Carve the Turkey
Many families have their own traditions for carving the turkey. They usually involve slicing the breast and separating the dark meat pieces.
The best slicing comes if you have allowed the turkey to cool for a few minutes and if you have a very sharp knife. We used to have an electric knife that did an excellent job, too, but when it died we didn't replace it because this was about the only thing we used it for.
It helps to have a meat fork and a large enough platter to set the turkey on to carve. I also get a couple of plates handy to lay the slices on. If you have a large enough dining area to put the turkey on the table and cut it up in front of people, you'll just ask your second-in-command to pass the plates around. We usually wind up cutting the turkey in the kitchen and just bringing the meat over to the table on platters, so that simplifies the dynamics of getting a whole cooked turkey into the next room and having to work around it for a meal. If you do slice the turkey in the kitchen, there are some shortcuts we will tell you momentarily.
Cutting the turkey in front of people on a major holiday is a lot like cutting wedding cake - people have certain expectations. Generally it works well for you to pin the side of the turkey lightly with your meat fork about the place where the breast seems to be thickest. Then cut at an angle until you have made a thin slice that is sort of an oval with the fork tines in the middle. That piece should go to whoever likes the turkey skin, because nobody else who gets white meat will get any skin to speak of. Your next several slices should follow your first cut. So the first part usually goes well. Eventually, though, depending on the size of your turkey, you may find yourself working around the rib cage or something. It you want to start on the other side, you may. Or, if most people have been served, give yourself any piece that is a funky shape.
Cutting dark meat is more a separation than an actual cutting. Usually you can get a thigh and leg away from the body of the turkey with a little tug. Then use your knife to cut the leg away from the thigh (slice where the kneecap would be if the things actually had kneecaps). If the thigh is big enough, you may be able to get a few slices of dark meat off it. In my household, I usually pull the meat off the leg and put half of the meat from a leg on the plate for one of my dark-meat-loving children (they would all eat a whole turkey leg of any size given the opportunity). Don't give turkey leg meat to young children, though - there are some bone-like pieces in with the meat that they could find troublesome.
Now here's the "shortcut" to slicing the turkey breast when you can do it out of sight. Cut the whole piece of breast away from the ribs and lay it on a cutting board. Then cut it into thin slices, perpendicular to the length of the breast. That way you won't have any huge slices, but the slices will be much more uniform. You're also less likely to "shred" the thing than you might carving the turkey on the table (where the angle of the cut is almost with the grain at times).
Information on cutting a turkey can also be found at the
Norbest(r) web site. They also have a
downloadable brochure you can print out on the subject.
At the bottom of this page, we have links to many other resources, in case you still get stumped, or if you have a question we haven't answered. Still, we expect you to find that buying your first turkey and reading up on cooking it took more time than the turkey actually took to prepare (if you don't count the time it was roasting by itself in the oven or cooker).
So eventually, you will have a happy crowd drifting off to sleep leaving you to clean up the mess.
Cleaning Up the Mess
Now is the time where most people want to get out of the kitchen. If you're in a hurry, or not that concerned about leftovers or broth, pull the rest of the white meat off the bones, pull off any remaining limbs, put the meat you're saving into something that will fit in the
refrigerator, dump the rest into a very sturdy trashbag, and wash up. If you want to get meat for leftovers and broth for future gravy or casseroles, here is the way I do it.
Your biggest "enemy" at this point isn't potential contamination, but grease - the turkey will get slippery and you'll have trouble holding your knife. I usually try to keep my right hand fairly clearly clean so I can wield the knife, but I also work next to the sink and a roll of paper towels.
- Get out two storage containers, one to contain white meat and one for the dark meat (if the turkey was small or there's not much left, I may make do with one, but I keep the meats separated in the container).
- Get out two or three of those plastic grocery bags, stick them inside each other and position them so that you'll be able to reach it and dump turkey bones into it with greasy fingers. Eventually these will contain what's left of the turkey when you're done getting the meat off it.
- Get out a bowl or something to hold bones and scraps as you work. Eventually you'll stick this stuff into the bags to throw away, but in the meantime, it's easier if you can throw bones and stuff aside as you work.
- Slice off the rest of the white meat off the same way you started.
- When you get down to where it's too hard to actually slice, pull any remaining white meat away from the bones. There may be brown stuff on the edge that was "inside." That won't affect flavor, but if you want to trim it off now or later, you may.
- Pull off any remaining limbs. If a drumstick/thigh combination remains, cut them apart before storage.
- If you want to pull the dark meat from the drumstick, thigh and wings before you store it, go ahead. But make certain that you pull the goofy "bone splints" out of the meat from the drumstick, so the next person getting into the storage container doesn't accidentally get one into a sandwich and bite into it.
- The tail is worthless
- Turn what remains of the turkey over. There will be two serving-spoon sized bits of dark meat on the back of the hip bones, and two smaller bits where the backbone meets the ribs. Put those in with the dark meat. If you have a large turkey you might see other bits of meat worth salvaging, but otherwise you're done (unless you want to harvest some scraps for your cat).
- Put the rest of the bones and any other scraps into the bag you've set aside for trash, then poke through what's left in your roaster. Let any useful pieces of meat drain a little and store them with the meat. Put the skin and anything else into the trash bag.
- Wash your hands and put away the storage containers.
- Pour any remaining turkey broth into a container you can put into the refrigerator. If necessary, get someone to help you. If you want, you can strain it through a colander.
- Put the bags containing your scraps somewhere where the raccoons can't get to it between now and trash day.
- If you used a cooking bag, throw it away, too.
- Clear out the sink.
- Rinse the roaster or pan you used a couple of times with hot water, being careful not to spill any of the greasy water on the floor around you. Put a dime-sized dot of dish soap into the pan, and fill it with hot water up to the edge of the burnt part. Set it aside.
- Wash the bowl you used to contain scraps and any other large pieces you've dirtied, such as a colander, if you've used that.
- Go watch the rest of the football game. When it's over, come back out and scrub out the pan/roaster
- Set the pan/roaster to dry somewhere.
This may seem like a lot of trouble compared to making room in the refrigerator to stick the whole thing in until you get around to it, but most folks never "get around to it."
Conclusion and Best Wishes
Here's hoping you have the very best holiday ever. Please let us know if you come up with any suggestions or things we left out or things we should have left out or things we should change. If by working with us, you can help us make the next family's holiday happier or more meaningful, that's good for all of us.
Happy Thanksgiving and Merry Christmas,
Paul
FamilyChristmasOnline.com
Hotlines and Other Resources
Thanks to the North Carolina Department of Health, who compiled most of this list.
To return to the Family Christmas Recipes page, click here.
To return to the Family Christmas OnlineTM Home Page, click here.
|


|

